Bootstrap Checkbox HTML
Intro
In some cases the simplest features may possibly become extremely essential-- specifically in case you come to need them. As an example exactly how do your visitors communicate with the webpages you make claiming a basic Boolean act-- just yes or no relating to some of the issues you should request, how they do consent to the conditions and terms or maybe line up a few of the practical options they might possess. We in most cases surpass this without paying a lot of an care to the feature accountable for these types of actions yet the Bootstrap Checkbox Switch is certainly a very serious component-- one our forms cannot in fact complete without.
Located in newest fourth version of the Bootstrap framework we are delivered with the
.form-check.form-check-label<div>.form-check.form-check-label<label><input>.form-check-inputThe way to apply the Bootstrap checkbox:
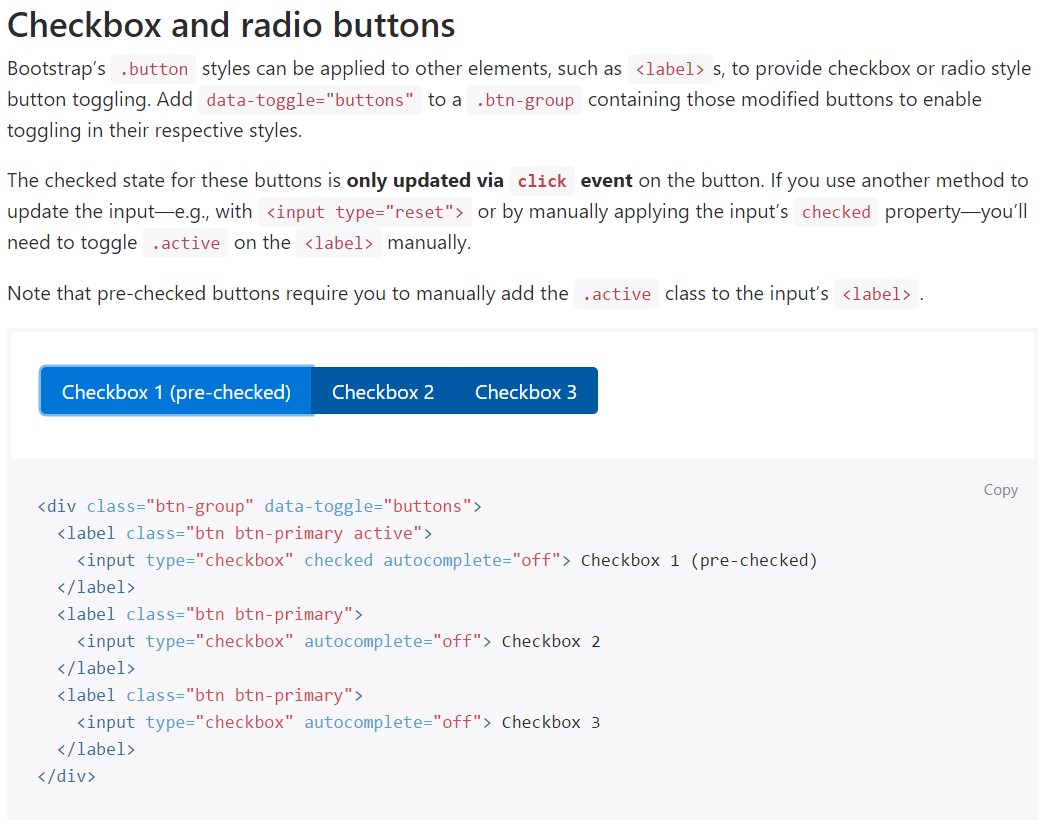
Bootstrap's
.button<label>data-toggle=" buttons".btn-group
<div class="btn-group" data-toggle="buttons">
  <label class="btn btn-primary active">
    <input type="checkbox" checked autocomplete="off"> Checkbox 1 (pre-checked)
  </label>
  <label class="btn btn-primary">
    <input type="checkbox" autocomplete="off"> Checkbox 2
  </label>
  <label class="btn btn-primary">
    <input type="checkbox" autocomplete="off"> Checkbox 3
  </label>
</div>
In some cases we need to have the checkboxes to be within our forms without the customer really can bring any sort of action clicking them-- that is generally where exactly the disabled option appears in.
In order to disable efficiently a checkbox in Bootstrap 4 employing the standard HTML attribute
disabledOn the occasion that you really like the idea and in fact would like to accomplish this you need to assign the
.disabled.form-checkOne other example
Anytime working with checkboxes, wrap them in a
<label>.custom-control.custom-checkboxApply
.custom-control-input<input>Also use two
<span>.custom-control-indicator.custom-control-description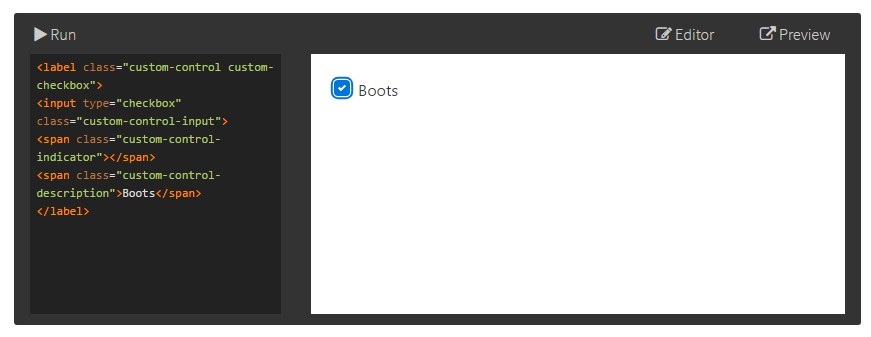
<label class="custom-control custom-checkbox">
<input type="checkbox" class="custom-control-input">
<span class="custom-control-indicator"></span>
<span class="custom-control-description">Boots</span>
</label>
Bootstrap Checkbox Design forms
Default checkboxes and radios are upgraded upon with the assistance of
.form-checkDisabled checkboxes and radios are assisted, however, to deliver a
not-allowed<label>.disabled.form-checkA new component for the Bootstrap edition 4 framework is the creation of the so called customized form components. These are the same features we are knowing inside performance yet styled even more attractive and also with the Bootstrap approach. Using them you can certainly incorporate fascinating spice and charm to your web content with just specifying a number of extra classes to the controls you include in your forms.
For you to work with custom-made checkboxes wrap them within a
<label>.custom-control.custom-checkbox<input>.custom-control-input<span>.custom-control-indicator.custom-control-descriptionFinal thoughts
That's mostly all that you ought to perform in order to place a checkbox feature in your Bootstrap 4 powered web site and bring in a number of custom flavor to it adding in it a cool appeals. Currently everything you require to do is repeat the exercise before you have actually inspected all of the checkboxes desired are actually on the web page.
Look at some youtube video guide about Bootstrap checkbox
Linked topics:
Bootstrap checkbox main records
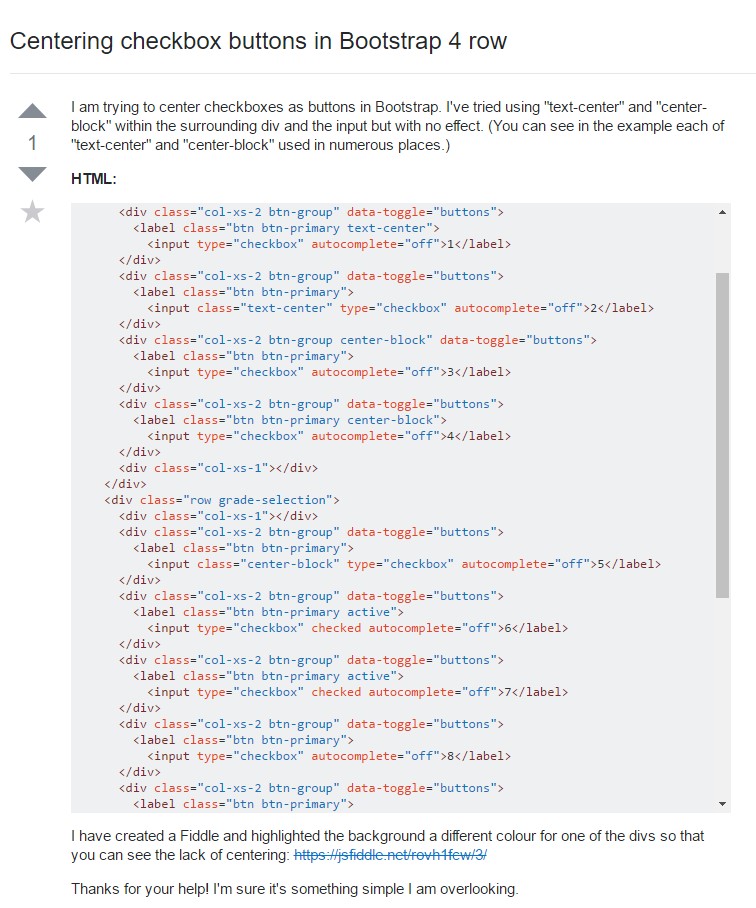
Centering checkbox buttons in Bootstrap 4 row
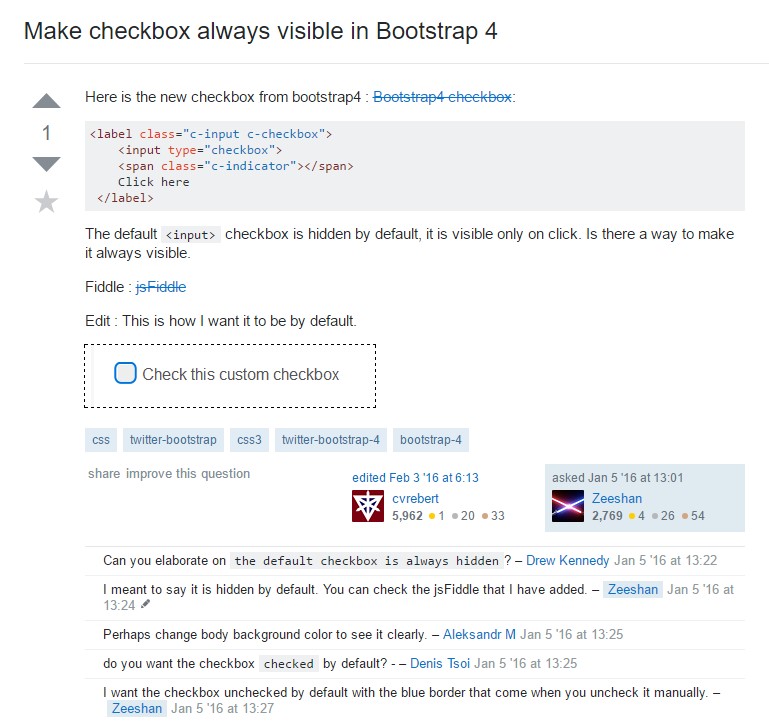
Make checkbox always visible in Bootstrap 4